Potree Standard Templates
This page will cover details on how to build a web page with a Potree viewer using already available functionalities.
Examples
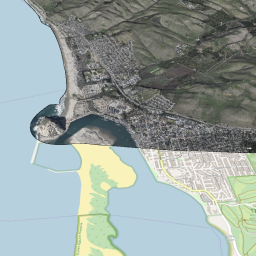
Basic Viewer
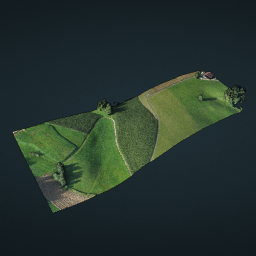
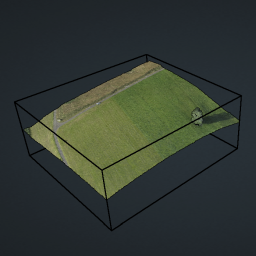
After cloning the Potree develop repository as suggested in section [reference], navigate to the examples folder and search for the viewer.html file. This file template includes the basic settings for a functional Potree Viewer and represents the basis for all the other examples too.
In the head section you can find all the stilesheets’ references for each library needed in the basic viewer, defining the rendering of the Potree navigation area as well as the sidebar appearance. In this section, like every HTML page, it is possible to define the page title together with metadata information about the author and the content of the document.
<head>
        <meta charset="utf-8">
        <meta name="description" content="">
        <meta name="author" content="">
        <meta name="viewport" content="width=device-width, initial-scale=1.0, user-scalable=no">
        <title>Potree Viewer</title>

        <link rel="stylesheet" type="text/css" href="../build/potree/potree.css">
        <link rel="stylesheet" type="text/css" href="../libs/jquery-ui/jquery-ui.min.css">
        <link rel="stylesheet" type="text/css" href="../libs/openlayers3/ol.css">
        <link rel="stylesheet" type="text/css" href="../libs/spectrum/spectrum.css">
        <link rel="stylesheet" type="text/css" href="../libs/jstree/themes/mixed/style.css">
</head>
Diving in the body section, first used JS libraries and dependencies are included.
<script src="../libs/jquery/jquery-3.1.1.min.js"></script>
<script src="../libs/spectrum/spectrum.js"></script>
<script src="../libs/jquery-ui/jquery-ui.min.js"></script>
<script src="../libs/other/BinaryHeap.js"></script>
<script src="../libs/tween/tween.min.js"></script>
<script src="../libs/d3/d3.js"></script>
<script src="../libs/proj4/proj4.js"></script>
<script src="../libs/openlayers3/ol.js"></script>
<script src="../libs/i18next/i18next.js"></script>
<script src="../libs/jstree/jstree.js"></script>
<script src="../build/potree/potree.js"></script>
<script src="../libs/plasio/js/laslaz.js"></script>
The Potree container class is then defined, settings also the renderer area and the sidebar elements too. By changing the background.jpg path in the renderer area, it is possible to change the background image that appears at the beginning of the rendering.
<div class="potree_container" style="position: absolute; width: 100%; height: 100%; left: 0px; top: 0px; ">
        <div id="potree_render_area" style="background-image: url('../build/potree/resources/images/background.jpg');"></div>
        <div id="potree_sidebar_container"> </div>
</div>
In the following lines, the script create a new viewer and define the scene settings. By calling different functions, it also defines appeareance options like:
Eye-Dome Lightning: it could be enabled or disabled with .setEDLEnabled();
Field of View, defining the numerical value for the view angle with .setFOV();
Point Budget sets the default point population for point cloud rendering .setPointBudget();
Size of Octree Cells giving a numerical value as input to .setMinNodeSize();
Background appearance, choosing as parameter for .setBackground() one of the following 4 defaults options: skybox, gradient, black and white;
Description, a text defined with .setDescription() that supports HTML and appears on the top of the renderer area;
Setting parameters, loading with .loadSettingsFromURL() a file with the desired settings for appearance.
When applying .loadGUI(), it is possible to set the default style of the Potree sidebar by:
Setting the display language: simply put the language code inside .setLanguage();
Choosing the visibility of sidebar sections at loading: this can be done by passing the section class name (e.g. #menu_tools) inside $(“#menu_tools”).next().show(). The other class name are: [UPDDATE];
The visibility of the entire sidebar, set as true when including .toggleSidebar().
<script>
window.viewer = new Potree.Viewer(document.getElementById("potree_render_area"));
iewer.setEDLEnabled(false);
viewer.setFOV(60);
viewer.setPointBudget(1_000_000);
viewer.loadSettingsFromURL();
viewer.setBackground("skybox");
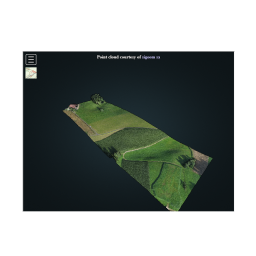
viewer.setDescription("Point cloud courtesy of <a target='_blank' href='https://www.sigeom.ch/'>sigeom sa</a>");
viewer.loadGUI(() => {
viewer.setLanguage('en');
$("#menu_tools").next().show();
("#menu_clipping").next().show();
viewer.toggleSidebar();
});
</script>
After setting the viewer and scene parameter, it’s time to include the point cloud. This can be done through the .loadPointCloud() function, including in the parenthesis:
the path to the file of the point cloud;
the name of the point cloud that will appear in the scene section of the sidebar (e.g. “sigeom.sa”);
Then, a series of parameters is set inside the loading function:
material.size defines the size of dots used for the cloud rendering;
material.pointSizeType indicates the point sizing view mode to be adopted in the render, choosing between the following options: FIXED, ATTENUATED or ADAPTIVE;
material.shape sets the shape used for point shape rendering. It could be SQUARE, CIRCLE or PARABOLOID;
material.pointColorType makes possible to select the attribute to be used for cloud coloring in the renderer area.
All these parameters corresponds to the properties accessible after clicking on the point cloud from the objects list in the scene sidebar section.
The .addPointCloud() is then applied to the scene to which the pointcloud should be added. Additionally, the view on the model is defined through the .setView() method that takes as input the coordinates of camera positions and targets.
<script>
        // Load and add point cloud to scene
        Potree.loadPointCloud("../pointclouds/vol_total/cloud.js", "sigeom.sa", e => {
                let scene = viewer.scene;
                let pointcloud = e.pointcloud;

                let material = pointcloud.material;
                material.size = 1;
                material.pointSizeType = Potree.PointSizeType.ADAPTIVE;
                material.shape = Potree.PointShape.SQUARE;
                material.pointColorType = Potree.PointColorType.RGB;

                scene.addPointCloud(pointcloud);

                viewer.fitToScreen();
                scene.view.setView(
                        [589974.341, 231698.397, 986.146],
                        [589851.587, 231428.213, 715.634],
                );
        });
</script>
Note
A useful trick for setting easily the view on the model is to click on Other/Camera in the Scene section of the Potree Sidebar. Once selected, this option will activate a new properties box with camera position and target coordinates dynamically changing as the user navigate through the model in the viewer. Those coordinates can easily be copied and pasted in the code.
CA13 (18 billion points)
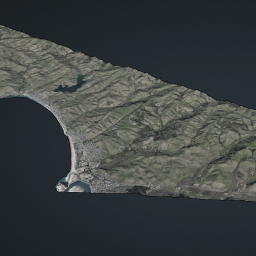
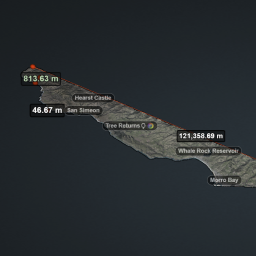
After cloning the Potree develop repository as suggested in section [reference], navigate to the examples folder and search for the ca13.html file. This file template includes the basic settings for a functional Potree Viewer that includes a point cloud with more than 18 billion points.
[TESTO]
<b><a href="https://labmgf.dica.polimi.it/">link</a></b> - Example of code-block.
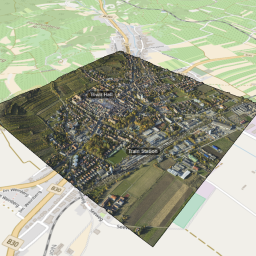
Retz (Potree + Cesium)
[TESTO]
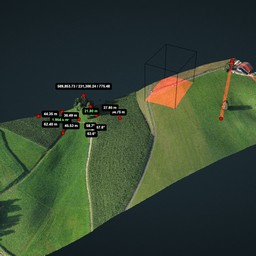
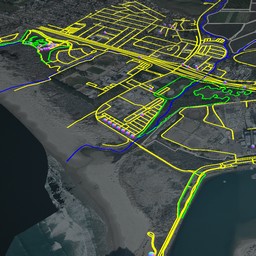
Classifications
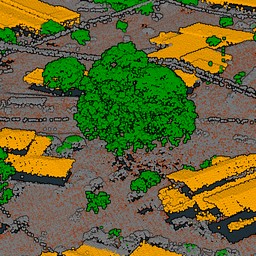
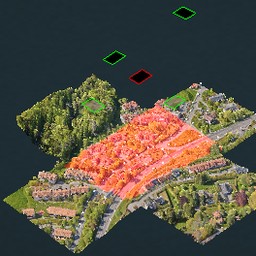
After cloning the Potree develop repository as suggested in section [reference], navigate to the examples folder and search for the classifications.html file. This file template includes the basic settings for a basic Potree Viewer (Basic Viewer) that includes a classified point cloud.
The main changes to the basic template consists in the definition of the type of visualisation for the pointcloud. In particular, this refers to the scalar field information to be considered when choosing the appearance of the point cloud. In this case, it is needed to show the classification of the point cloud, illustrating different classes of the territory like ground, building, water, low vegetation etc. To do so the active attribute for the point cloud material (material.activeAttributeName) should be set to the scalar field containing the required information to be shown (in this case, “classification”.)
Potree.loadPointCloud("http://5.9.65.151/mschuetz/potree/resources/pointclouds/opentopography/CA13_1.4/cloud.js", "CA13", function(e){
                     viewer.scene.addPointCloud(e.pointcloud);
                     e.pointcloud.position.z = 0;
                     let material = e.pointcloud.material;
                     material.size = 3;
                     material.pointSizeType = Potree.PointSizeType.FIXED;
                     material.activeAttributeName = "classification";

                     viewer.scene.view.position.set(694274.518, 3916261.987, 348.732);
                     viewer.scene.view.lookAt(694683.097, 3916386.916, 30.879);
             });
Note
To be sure that the point cloud properties are correctly defined, before converting it, check if one of its scalar field is correctly named as “classification” (in software like CloudCompare..).
The working example additionally shows how to create button with functions for changing the classification scheme and color. This is achieved by first defining the html code for the buttons inside the potree container div element. Indeed, 3 buttons are defined through as many input tags:
Default Scheme (with onclick function .setDefaultScheme()) associated to the original classification scheme already defined in the potree.js source;
Tree Scheme (with onclick function .setTreeScheme()) linked to a new custom scheme highlighting only points belonging to one specific class;
Random Scheme (with onclick function .setRandomScheme()) with a function that randomly change colors of all classes.
<div class="potree_container" style="position: absolute; width: 100%; height: 100%; left: 0px; top: 0px; ">
              <div id="potree_render_area" style="background-image: url('../build/potree/resources/images/background.jpg');">

                      <span style="position: absolute; bottom: 10px; left: 50%; transform: translateX(-50%); z-index: 10000">
                              <input type="button" value="Default Scheme" onclick="setDefaultScheme()"/>
                              <input type="button" value="Tree Scheme" onclick="setTreeScheme()"/>
                              <input type="button" value="Random Scheme" onclick="setRandomScheme()"/>
                      </span>

              </div>
              <div id="potree_sidebar_container"> </div>
      </div>
The set of operations executed by each function is later defined inside a script block.
import * as THREE from "../libs/three.js/build/three.module.js";

              window.setDefaultScheme = function(){
                      viewer.setClassifications(Potree.ClassificationScheme.DEFAULT);
              }

              window.setTreeScheme = function(){
                      viewer.setClassifications({
                              5:       { visible: true, name: 'trees'        , color: [0.0, 1.0, 0.0, 1.0] },
                              DEFAULT: { visible: false, name: 'other' , color: [0.0, 0.0, 0.0, 1.0] },
                      });
              }

              window.setRandomScheme = function(){
                      const scheme = {};

                      for(let i = 0; i < 32; i++){
                              scheme[i] = { visible: true, name: `random:_${i}`, color: [Math.random(), Math.random(), Math.random(), 1.0] };
                      }

                      viewer.setClassifications(scheme);
              }
First, .setDefaultScheme() is defined by giving as input to the .setClassifications() method the standard classification scheme defined by default in the potree.js source code as follows:
const ClassificationScheme = {

              DEFAULT: {
                      0:       { visible: true, name: 'never classified'  , color: [0.5,  0.5,  0.5,  1.0] },
                      1:       { visible: true, name: 'unclassified'      , color: [0.5,  0.5,  0.5,  1.0] },
                      2:       { visible: true, name: 'ground'            , color: [0.63, 0.32, 0.18, 1.0] },
                      3:       { visible: true, name: 'low vegetation'    , color: [0.0,  1.0,  0.0,  1.0] },
                      4:       { visible: true, name: 'medium vegetation' , color: [0.0,  0.8,  0.0,  1.0] },
                      5:       { visible: true, name: 'high vegetation'   , color: [0.0,  0.6,  0.0,  1.0] },
                      6:       { visible: true, name: 'building'          , color: [1.0,  0.66, 0.0,  1.0] },
                      7:       { visible: true, name: 'low point(noise)'  , color: [1.0,  0.0,  1.0,  1.0] },
                      8:       { visible: true, name: 'key-point'         , color: [1.0,  0.0,  0.0,  1.0] },
                      9:       { visible: true, name: 'water'             , color: [0.0,  0.0,  1.0,  1.0] },
                      12:      { visible: true, name: 'overlap'           , color: [1.0,  1.0,  0.0,  1.0] },
                      DEFAULT: { visible: true, name: 'default'           , color: [0.3,  0.6,  0.6,  0.5] },
              }
      };
In this way, for instance, each point containing the 0 value in the scalar field previously selected in the html code, will be considered as “never classified” and will be visible in the scene in the given RGBA color. If not explicitly stated in the scheme with a number, a point value will be assigned to the default class.
Such scheme is altered with the definition of the .setTreeScheme() in which all the points associated to the classification value 5 (originally “high vegetation”) are assigned to a new class called “tree”. All the other values are instead left in the other class, whose visibility is set as false (hidden).
Eventually, the .setRandomScheme() function, after defining a new empty scheme object, loop through 33 consecutive values and assign them a random triplet of RGBA colors.
Various Features
[TESTO]
Toolbar
[TESTO]
Load Project
[TESTO]
Matcap
[TESTO]
Virtual Reality
[TESTO]
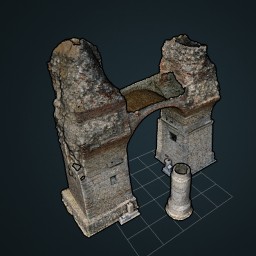
Heidentor
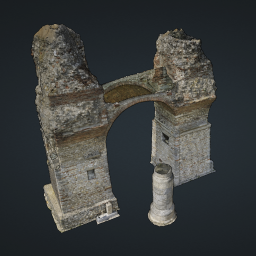
[TESTO]
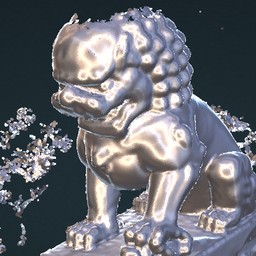
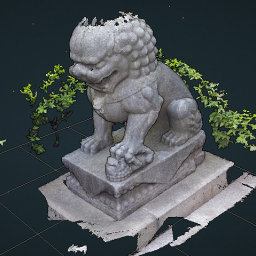
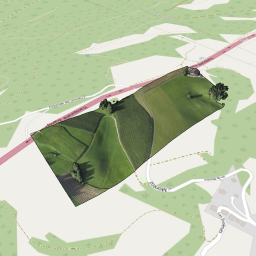
Lion
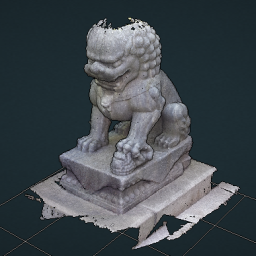
After cloning the Potree develop repository as suggested in section [reference], navigate to the examples folder and search for the lion.html file. This file template includes the basic settings for a functional Potree Viewer (Basic Viewer) equipped with examples of custom sidebar.
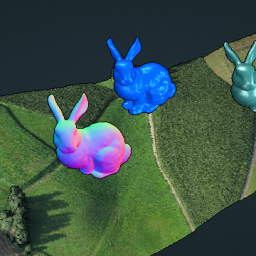
This example show the rendering of the lion point cloud.
Lion LAS
After cloning the Potree develop repository as suggested in section [reference], navigate to the examples folder and search for the lion_las.html file. This file template includes the basic settings for a functional Potree Viewer (Basic Viewer) equipped with examples of custom sidebar.
This example show the rendering of the lion LAS point cloud in a basic viewer.
Lion LAZ
After cloning the Potree develop repository as suggested in section [reference], navigate to the examples folder and search for the lion_laz.html file. This file template includes the basic settings for a functional Potree Viewer (Basic Viewer) equipped with examples of custom sidebar.
This example show the rendering of the lion LAZ compressed point cloud in a basic viewer.
EPT
[TESTO]
EPT Binary
[TESTO]
EPT zstandard
[TESTO]
Clipping Volume
[TESTO]
Oriented Images
After cloning the Potree develop repository as suggested in section [reference], navigate to the examples folder and search for the oriented_images.html file. This file template includes the basic settings for a functional Potree Viewer (Basic Viewer) equipped with examples of custom sidebar.
In addition to the standard code for the simple basic viewer, the html page include an additional script element with the required functions to load the oriented images. Indeed, first the script declare 2 constants:
cameraParamsPath that is defined with a file path to the .xml document that contains the calibration parameters (focal length, image width, length etc.) of the camera used to capture the oriented images.
imageParamsPath which refers to the file path of the .txt document in which the oriented images parameters are listed together with the corresponding image name files.
The given constants are then passed together with the viewer element into the Potree.OrientedImageLoader.load() that then adds the images to the Potree viewer and scene.
<script type="module">
  import * as THREE from "../libs/three.js/build/three.module.js";
  const cameraParamsPath = "http://5.9.65.151/mschuetz/potree/resources/pointclouds/helimap/epalinges/img_selected/IXM35_190522_nodistortion.xml";
  const imageParamsPath = "http://5.9.65.151/mschuetz/potree/resources/pointclouds/helimap/epalinges/img_selected/Calib190522_MN95_NF2_cam_estim.txt";

  Potree.OrientedImageLoader.load(cameraParamsPath, imageParamsPath, viewer).then( images => {
    viewer.scene.addOrientedImages(images);
              });

      </script>
In order to run smoothly the entire process, it is important that the parameters file are formatted correctly.
Note
In particular, the image parameters file should carefully respect the structure of the example below, with orientation angles indicated as Omega, Phi and Kappa.
# CoordinateSystem: PROJCS["CH1903+ / LV95",GEOGCS["CH1903+",DATUM["CH1903+",SPHEROID["Bessel 1841",6377397.155,299.1528128,AUTHORITY["EPSG","7004"]],TOWGS84[674.374,15.056,405.346,0,0,0,0],AUTHORITY["EPSG","6150"]],PRIMEM["Greenwich",0,AUTHORITY["EPSG","8901"]],UNIT["degree",0.01745329251994328,AUTHORITY["EPSG","9102"]],AUTHORITY["EPSG","4150"]],PROJECTION["Oblique_Mercator",AUTHORITY["EPSG","9815"]],PARAMETER["latitude_of_center",46.95240555555561],PARAMETER["longitude_of_center",7.439583333333329],PARAMETER["azimuth",90],PARAMETER["recitified_grid_angle",90],PARAMETER["scale_factor",1],PARAMETER["false_easting",2600000],PARAMETER["false_northing",1200000],UNIT["metre",1,AUTHORITY["EPSG","9001"]],AUTHORITY["EPSG","2056"]]
#Label        X/Easting       Y/Northing      Z/Altitude      Omega   Phi     Kappa   X_est   Y_est   Z_est   Omega_est       Phi_est Kappa_est
47521.jpg     2541968.212303  1156043.192768  1004.707676     3.557724        3.273124        -40.010726
47524.jpg     2542076.519349  1155923.975329  1009.489869     0.136003        4.313254        -43.116678
47549.jpg     2542027.910785  1155984.936730  1013.691026     -2.697229       0.813820        135.395195
47561.jpg     2542105.017595  1156065.259213  1014.761372     -0.735153       -2.127324       -132.847907
47588.jpg     2541950.983809  1155914.133744  1100.203228     -0.849119       6.052296        43.560809
[ADD DETAILS ON HOW TO EASILY CREATE THESE FILES WITH COMMERCIAL SOFTWARE (METASHAPE)]
Elevation Profile
[TESTO]
Measurements
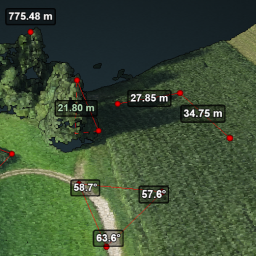
[TESTO]
Meshes
[TESTO]
Multiple Point Clouds
[TESTO]
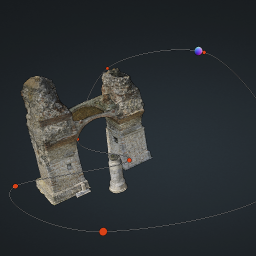
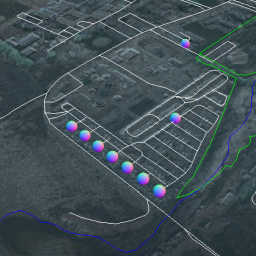
Camera Animation
After cloning the Potree develop repository as suggested in section [reference], navigate to the examples folder and search for the camera_animation.html file. This file template includes the basic settings for a functional Potree Viewer (Basic Viewer) equipped with examples of an implemented camera animation.
In order to include by default a camera animation to the Potree viewer, it is simply needed to include a script module in the html body script as follows:
<script type="module">

      import * as THREE from "../libs/three.js/build/three.module.js";

              const animation = new Potree.CameraAnimation(viewer);


              const positions = [
                      [590291.6145250637, 231565.3152460147, 888.181158774433],
                      [590094.2454560432, 231235.32163877538, 870.7535717968211],
                      [589675.8154371583, 231058.22066649256, 905.3068746322883],
                      [589328.6700949036, 231385.37585641106, 813.9565903445384],
              ];

              const targets = [
                      [589859.3465488373, 231456.18943956672, 758.2733646218901],
                      [589846.4463098792, 231431.89813285187, 755.9090168440739],
                      [589824.0843049305, 231444.72309070674, 760.3459659610106],
                      [589799.7263767472, 231473.79043369304, 758.8332698380435],
              ];

              for(let i = 0; i < positions.length; i++){
                      const cp = animation.createControlPoint();

                      cp.position.set(...positions[i]);
                      cp.target.set(...targets[i]);
              }

              viewer.scene.addCameraAnimation(animation);


      </script>
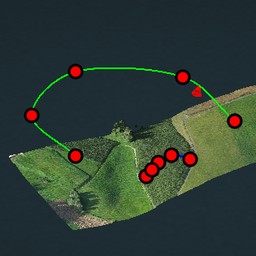
This code, after defining coordinates for camera positions and targets - that can be achieved as suggested in the basic viewer note -, create the control point of the animation upon which the animation trajectory is built. Then, the animation is added to the scene with the .addCameraAnimation() method.
Features (CA13)
[TESTO]
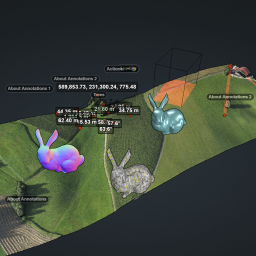
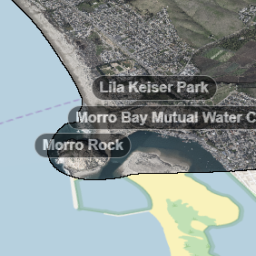
Annotations
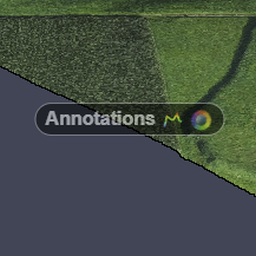
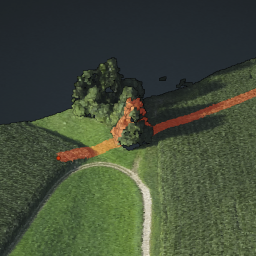
After cloning the Potree develop repository as suggested in section [reference], navigate to the examples folder and search for the annotations.html file. This file template includes the basic settings for a functional Potree Viewer (Basic Viewer) equipped with examples of interactive annotations.
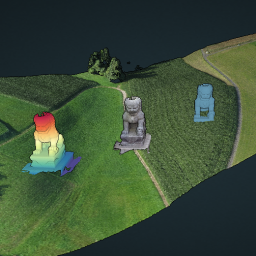
In this example, first 2 distinct scenes are defined (Potree.Scene()). The first one (sceneSG) through the .setScene() method is set as the main one to be adopted when the viewer is loaded on the page. The other one will be later used as the target for an action embedded in an annotation.
let sceneSG = new Potree.Scene();
let sceneLion = new Potree.Scene();

viewer.setScene(sceneSG);
Then, the code includes the settings from the basic viewer for loading a pointcloud to the main scene previously named sceneSG. After that, a series of annotations is finally initialised. In particular the first one is defined as follow:
{
        let elTitle = $(`
                <span>
                        About Annotations
                        <img src="${Potree.resourcePath}/icons/goto.svg"
                        name="action_set_scene"
                        class="annotation-action-icon"
                        style="filter: invert(1);" />
                </span>
        `);

        elTitle.find("img[name=action_set_scene]").click( (event) => {
                event.stopPropagation();
                viewer.setScene(sceneLion);
        });
        elTitle.toString = () => "About Annotations";
        let aAbout1 = new Potree.Annotation({
                position: [590043.63, 231490.79, 740.78],
                title: elTitle,
                cameraPosition: [590105.53, 231541.63, 782.05],
                cameraTarget: [590043.63, 231488.79, 740.78],
                description: `<ul><li>Click on the annotation label to move a predefined view.</li><li>Click on the icon to execute the specified action.</li>In this case, the action will bring you to another scene and point cloud.</ul>`
        });

        sceneSG.annotations.add(aAbout1);
}
In this example, first the title (elTitle) to be shown in the annotation label is defined. In this variable HTML is supported to set style and semantics of the title, enabling also the inclusion of images (with the img tag) linked to action. Indeed, by defining a name for the image element, later is possible to implement an action when the label is clicked by the user. This happens by defining a series of operations to be executed when the image named action_set_scene is clicked: all the desired operations should then be included with the final brackets of elTitle.find(“img[name=action_set_scene]”).click(). In this case, the action triggers the initiation of another scene (viewer.setScene(sceneLion)), calling the previously defined sceneLion.
Finally, a simple string name for the annotation is defined with .toString in order to have it implemented in the Scene tree in the Potree Sidebar.
Eventually, the Potree.Annotation object is finalised by declaring its position, title (linking to the previously declared variable), cameraPosition, cameraTarget and description. The desired camera position and camera target can be defined using the camera object in the scene list of the Potree Sidebar and are needed to define the view on the annotation once the label is clicked by the user.
Then, it’s time to add the annotation to the main scene with sceneSG.annotations.add(aAbout1).
[TO BE COMPLETED]
Hierarchical Annotations
[TESTO]
Animation Paths
[TESTO]
Shapefiles
[TESTO]
Cesium CA13
[TESTO]
Geopackage
[TESTO]
Cesium Sorvilier
[TESTO]
Custom Sidebar Section
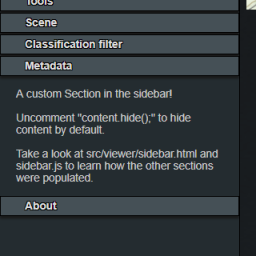
After cloning the Potree develop repository as suggested in section [reference], navigate to the examples folder and search for the custom_sidebar_section.html file. This file template includes the basic settings for a functional Potree Viewer (Basic Viewer) equipped with examples of custom sidebar.
In the body section inside the script block, after defining the basic settings for initialising the viewer, the sidebar section are called inside the .loadGUI() function: First the new section name is declared with a variable (let section). To define its name and keeping the style coherent with the rest of the sidebar sections, simply substitute Metadata with the desired title. Advanced style settings can be performed as well accoring to CSS sintax. Then the title is attached to the content variable (let content). Finally the the section is populated with an HTML-compatible content (content.html()). This can include texts as well as other media. The new section is then inserted in the standard sidebar by first setting the toggling functionaly on click (.slideToggle()) and then indicating its order position in relation to the other sections (.insertBefore()). The visibility at first page loading is set by including the code the section variable name followed by .hide().
<script type="module">
  viewer.loadGUI(() => {
                      viewer.toggleSidebar();

                      let section = $(`
                              <h3 id="menu_meta" class="accordion-header ui-widget"><span>Metadata</span></h3>
                              <div class="accordion-content ui-widget pv-menu-list"></div>
                      `);
                      let content = section.last();
                      content.html(`
                      <div class="pv-menu-list">
                              A custom Section in the sidebar!<br>
                              <br>
                              Uncomment "content.hide();" to hide content by default.<br>
                              <br>
                              Take a look at src/viewer/sidebar.html and sidebar.js to
                              learn how the other sections were populated.
                      </div>
                      `);
                      section.first().click(() => content.slideToggle());
                      section.insertBefore($('#menu_about'));

              });
</script>
[TESTO]
Embedded iframe
This example simply illustrates how to set up a webpage with a Potree Viewer embedded in iframe HTML element. The example code is available in the examples folder in the embedded_iframe.html file
The iframe implementation is possible once a proper viewer is set up in a dedicated html file. In the case of the code example, the iframe is included in the body section in a div element and refers to the Potree viewer set in the Basic Viewer example. In order to change the viewer page to be embedded, subtitute viewer.html in the code below with the name of the html page in which you defined a Potree viewer.
<html>
  <head></head>
  <body>
    <div style="position: absolute; left: 20%; right: 20%; top: 20%; bottom: 20%">
      <iframe src="viewer.html" style="width: 100%; height: 100%"></iframe>
    </div>
  </body>
</html>
In the div element additional settings are defined, including the style and the position of the element within the page following CSS standards.
Gradient colors

[TESTO]
// UNDER CONSTRUCTION //